Fluorescent paints are an amazing thing and the pigment that goes into it is pretty awesome too, but why do they get such a bad wrap for coverage?
Well, the thing is, the coverage is still there, but as in the last article on opacity pointed out, transparent particles of saturated colours will always provide poor coverage, but fluorescent pigments are a little different.
We did do some experimenting back in 2018 on fluorescent paints, but ultimately shelved it because of the coverage issue as we knew what would ultimately happen. It was too difficult to tell where you had applied the paint so when you put a UV or black light over it, the result was very patchy.
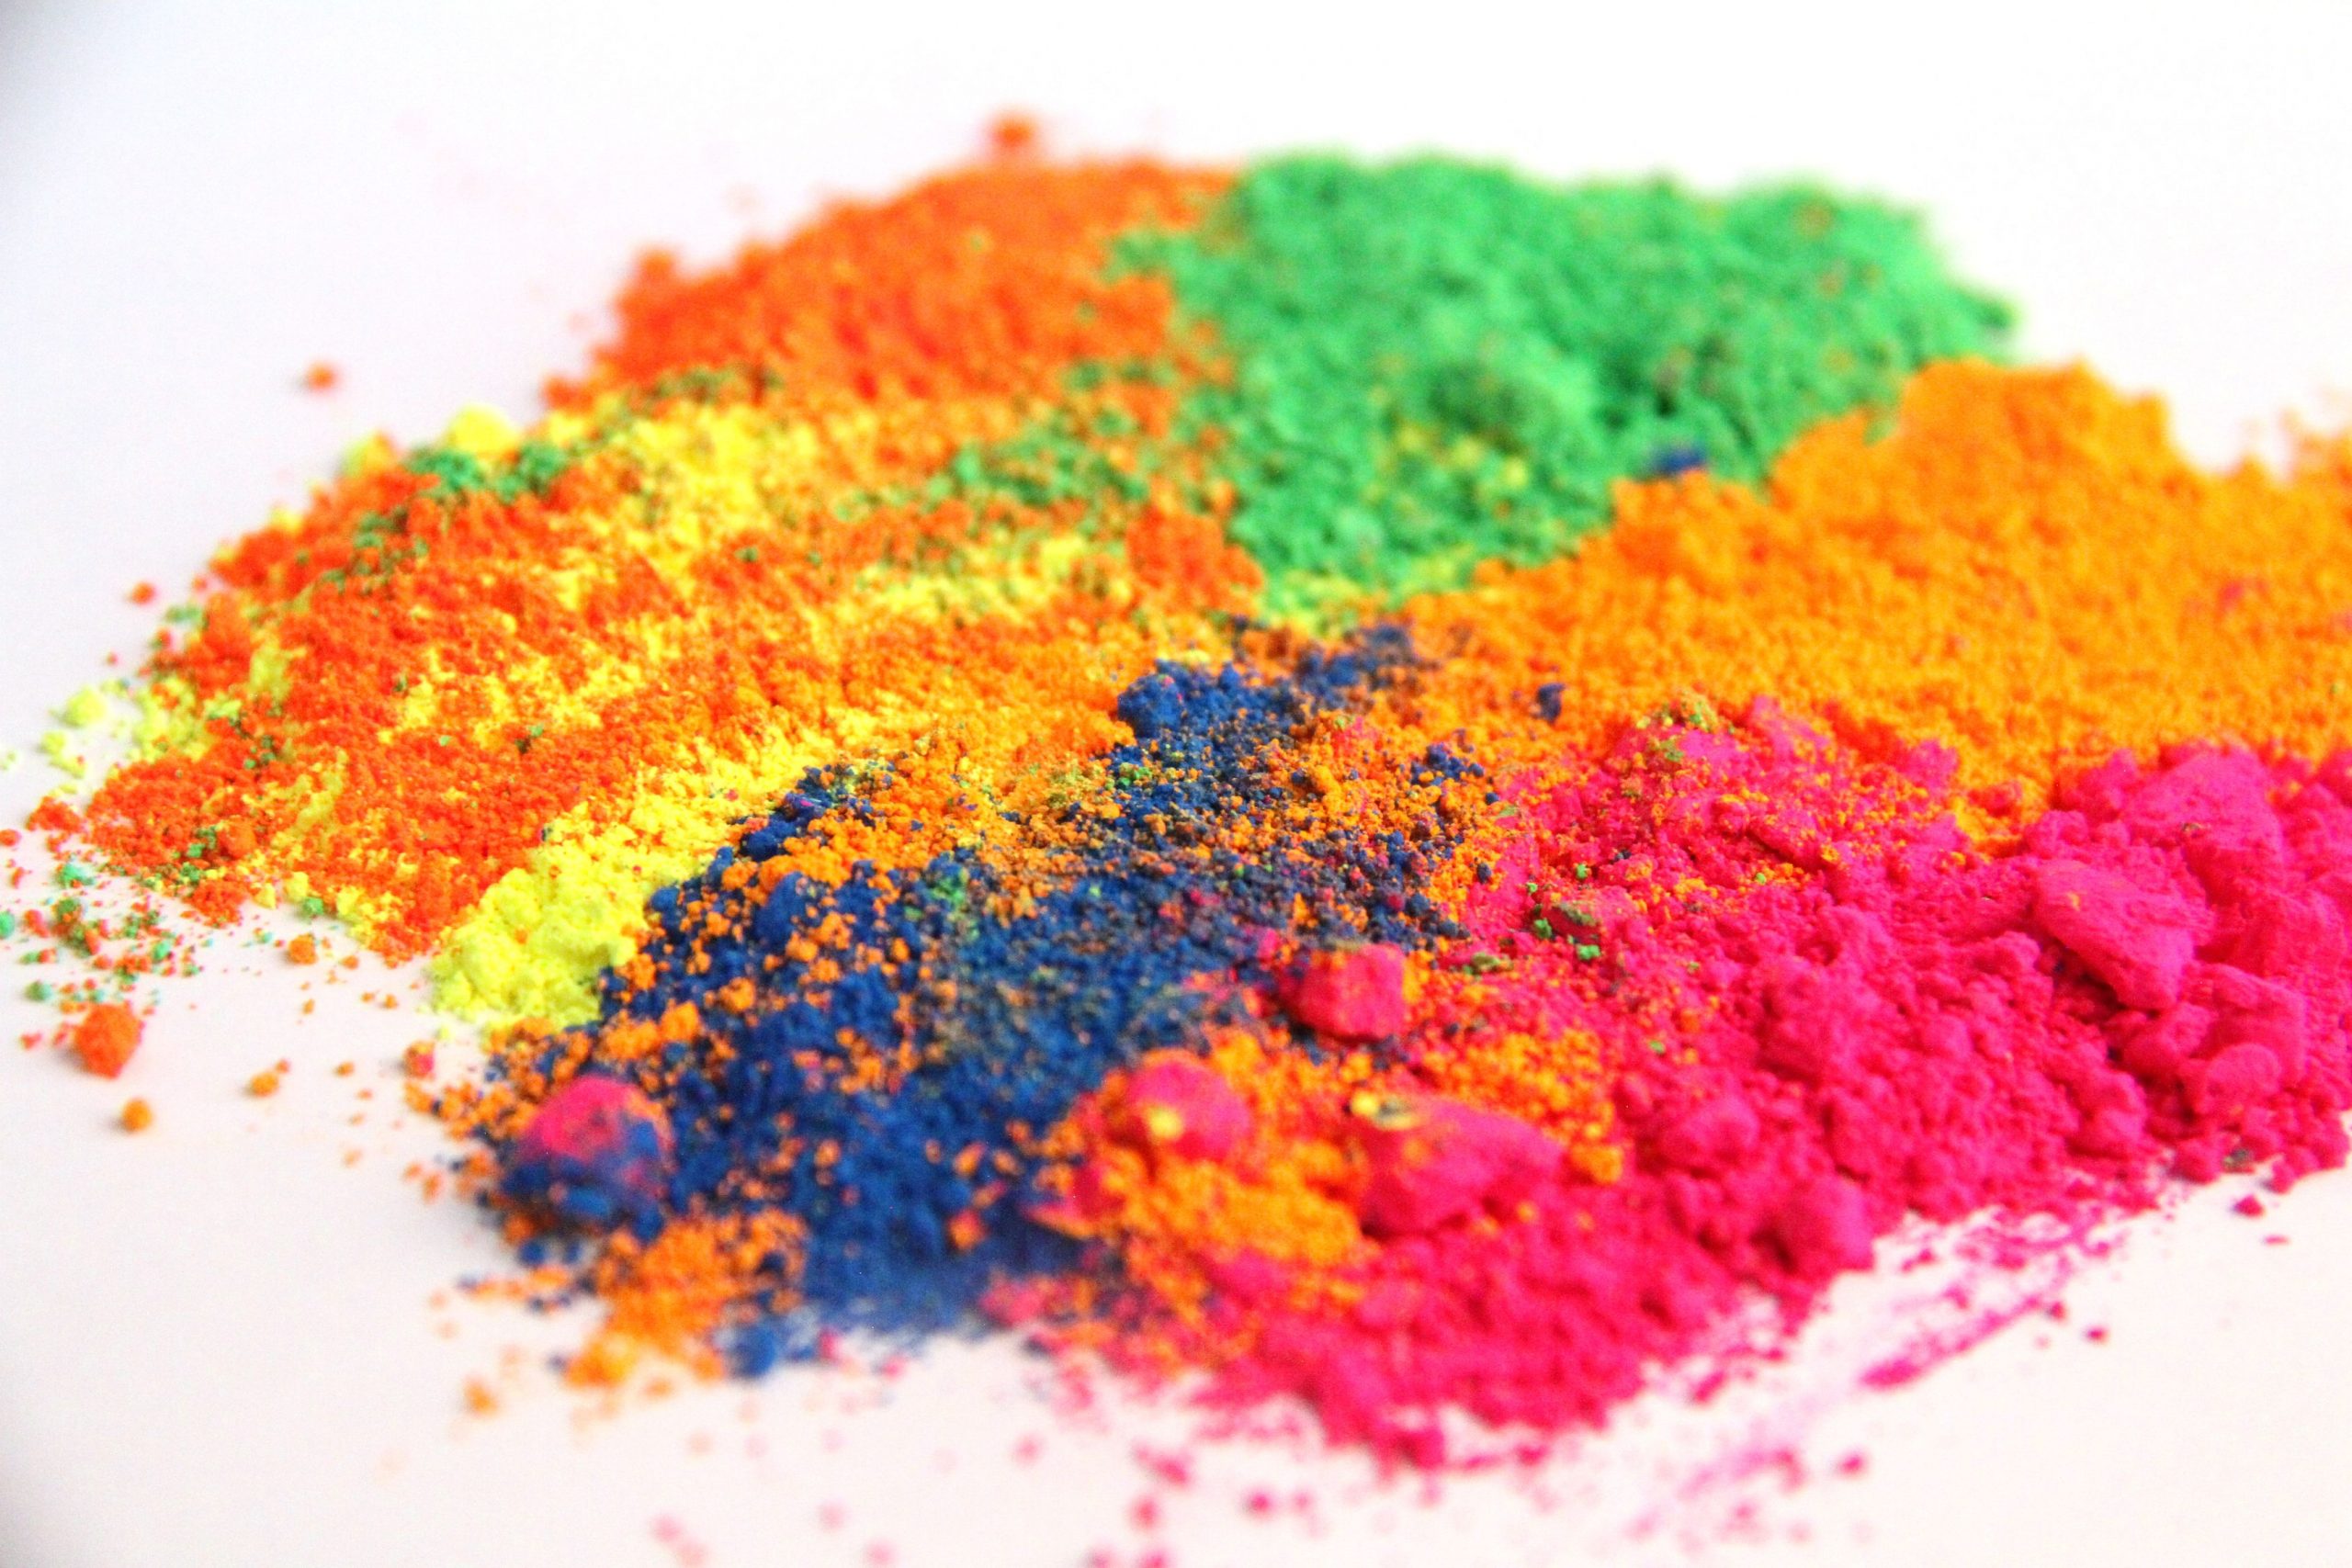
Fluorescent pigments are a little deceiving though because, as in the image on the right, they look very opaque much like an inorganic earth pigment, but fluorescent pigments rely on traditional pigments to distinguish the colour of the Fluorescent pigment under normal light conditions, but as soon as you turn it into a paint, that's where the issues begin.

All Fluorescent pigments are transparent....
Fluorescent pigments are made up of crystals constructed from a mix of trace active agents and either metal sulfides or rare-earth oxides. This results in a colourless/off white crystal that when excited by UV radiation will absorb and emit that radiation along a different wavelength depending on the amount of metal or rare earth oxide that it contains resulting in a emissive colour.
However, because of the limitations of the process, the strongest colours that can be created naturally are Magenta, Green and Yellow.
"But if the crystals are colourless, then why can you see the colour in the bottle?"
The simple reason for this is that the crystals are mixed with traditional pigment so you can differentiate between the colours, otherwise you'd have to buy a UV torch to see which colour is which as they would all be an off-white colour
DON'T thin your paints!
Fluorescent paints relies on strength in numbers, or to put it better, the more crystals there are, the better the glow. This is pretty much the reason why the colours look so opaque in bottles because the concentration of particles is so high that the light scattering effect and absorption rate of UV light by the pigment is multiplied an awful lot, so the thickness of the paint layer is an important factor in how effective the paint is.
Usually when these pigments are added to plastics or resin, the concentration of particles is still there so there's no limitations on the effect, however we come to the dreaded, poorly given, unhelpful advice of "Thin your paints" and why this is one of the sole reasons that fluorescent paints disappoint so quickly
The reason we said that the "Thin your paints" advice is usually poorly given is that not every single paint product has to be thinned (this is true of our Alpha product) and this would be the same case for Fluorescent paints although not thinning it doesn't really solve the issue either and adding an underlying colour actually makes things worse.
Why thinning fluorescent paint makes things worse...
Remember that little bit earlier about the pigments looking opaque, well when you introduce that pigment into a liquid medium, the pigments and crystals separate, While it can't be seen easily in the bottle, it's noticeable as soon as you apply it by brush.
When the colour is applied, the distance between the coloured pigment and the fluorescent crystals becomes greater and depending on how much coloured pigment there is in the product, what you end up applying is mostly transparent acrylic or as perceived...terrible coverage.
But in reality, the coverage is there, you just can't see it until you shine a UV light on it, but more than likely what happens is more layers are applied in a vain effort to get colour coverage under normal light, details become obscured and then frustration is vented on forums and discussion channels.
Why the underlying colour doesn't help either....
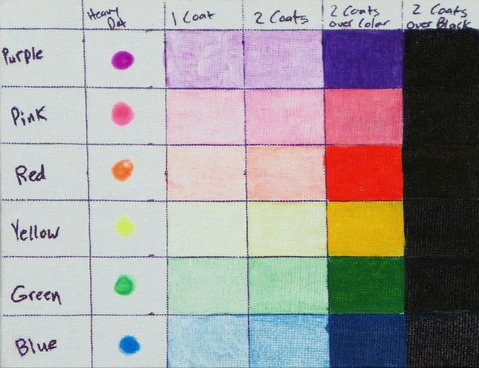
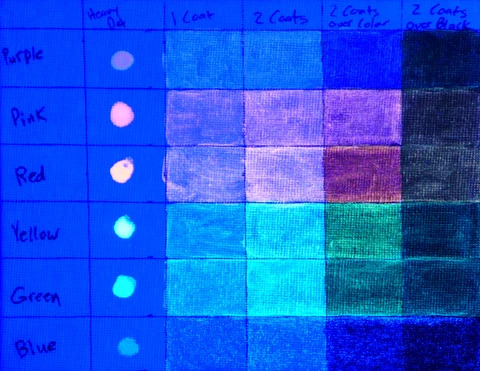
As you can see from the images on the right, applying fluorescent paints over a coloured undercoat results in the colour looking dull under UV light and over black it's seemingly not there at all under normal light and struggling under UV light , but we need to rewind back to the opacity issue and how colours work.
Fluorescent colours rely on UV light to work and the problem with coloured pigments and black in particular is that they absorb light meaning the Fluorescent paints have less to work with resulting in a poor performance.
The more UV light a Fluorescent paint can absorb, the more powerful it can emit that light on a certain wavelength, much like a coloured pigment only reflecting back certain parts of the light spectrum that hits it, just Fluorescent light does it much better, this means that while White underlayer is best, it has the disadvantage that under normal light, the White underlayer reflects more light back so the effect from the crystals isn't as apparent until they are excited by UV radiation which standard white pigments cannot reflect as easily.


Photos from artnglow.com for illustrative purposes only
But some Fluorescent colours cover better....
This would usually be a case of adding more coloured pigment to the bottle to provide better perceived coverage so the actual effect you're getting is from the pigment much as you would with normal paint. You can get better coverage from an airbrush due to the fact the particles would be more evenly dispensed onto a model compared to a brush, however, you would still need the concentration of crystals to be high enough to get a good effect.
You can see the effect in the image above with the coloured layers, this would be the same to a strong coverage from the paint to the model, the pigmentation is stronger and while it's still "Fluoresces" it's not quite the same as the effect under UV is greatly reduced as more of the coloured pigment is reflected back rather than the fluorescent crystals emitting the colour.
But what has to be remembered is that Fluorescent colours rely on UV light to work and UV light is something that's not in abundance with normal light, in fact it's only a very small part of the light spectrum so Fluorescent colours will always struggle under normal light, you would normally need at least 3-4 layers before you start to see a noticeable effect during the day or rather, increase the concentration of crystals on the surface.
So what should I do?
The simple answer is something we always say, experiment, but also remember that every pigment and paint is different and will require some adjustment to get the best from them as well as understanding the nature of the product.
In the case of these type of paints, personally, we wouldn't recommend doing a whole model with them as you would ultimately end up disappointed (mostly due to the severe lack of colours, they're not easy to mix as you have subtractive mixing pigments mixed with additive mixing crystals), but rather use them for smaller parts that you want to stand out under UV light such a trims, lights, spell effects etc.
Remember that the emissive colour will be invisible under normal light so if you do buy these type of paints, you'll be best off getting a UV/Black light as well so you can see how well the effect is being applied.
And lastly, bear in mind that these are a different type of paint and do not follow the same rules as standard paint production, if they did, you'd end up with....a normal paint, so you'll need to adjust expectations and techniques accordingly to get the best from them
Part one - Colour Science | Part two - Characteristics of Colour Mixing | Part three - Explaining Opacity | Part four - Fluorescent paints unwrapped | Part five - Digital Swatches and Reality